Kali ini, kami akan membahas tentang rahasia bonsai berumur ratusan tahun yang menjadi incaran para kolektor. Bonsai adalah seni yang memadukan keindahan alam dengan keahlian tangan manusia. Jadi, teruslah membaca artikel ini dan temukan keajaiban di balik bonsai yang mampu bertahan selama ratusan tahun.
Sejarah dan Asal Usul Bonsai
Bonsai adalah seni menanam pohon dalam ukuran miniatur yang berasal dari Jepang. Namun, sedikit yang tahu bahwa sejarah bonsai sebenarnya dimulai di Tiongkok pada zaman kuno. Praktik ini kemudian diperkenalkan ke Jepang oleh para biksu Zen pada abad ke-6.
Bonsai berasal dari kata “bon,” yang berarti wadah atau pot, dan “sai,” yang berarti menanam atau menumbuhkan. Makna yang terkandung dalam bonsai adalah menciptakan alam miniatur yang indah.Proses menciptakan bonsai tidaklah mudah.
Bonsai harus dipangkas secara teratur dan akar harus dipangkas agar tetap dalam ukuran miniatur. Selain itu, pemilihan pot yang tepat juga sangat penting untuk menciptakan tampilan yang harmonis.
Bonsai juga memiliki makna filosofis yang mendalam. Ia mengajarkan tentang kesederhanaan, ketenangan, dan keseimbangan dengan alam. Bonsai dapat memberikan perasaan kedamaian dan keindahan alam, meskipun dalam ukuran yang kecil.
Seiring berjalannya waktu, bonsai menjadi populer di seluruh dunia. Bonsai tidak hanya sebagai tanaman hias, tetapi juga sebagai seni yang membutuhkan pemahaman dan keterampilan khusus.
Sejarah dan asal usul bonsai mengungkapkan keindahan dan makna yang terkandung dalam praktik ini. Dalam dunia yang sibuk dan serba cepat seperti sekarang, bonsai dapat menjadi pelarian yang sempurna untuk menikmati keindahan alam dalam skala miniatur.
jika Kamu ingin mencoba hal baru yang menarik dan kreatif, mengasah keterampilan dan kesabaran Kamu dengan menciptakan bonsai bisa menjadi pilihan yang tepat.
Pengertian Bonsai dan Filosofi di Baliknya
Pengertian Bonsai dan Filosofi di BaliknyaBonsai adalah seni menanam dan membentuk pohon atau tanaman kecil dalam pot. Kata “bonsai” berasal dari bahasa Jepang yang terdiri dari dua karakter, yaitu “bon” yang berarti pot dan “sai” yang berarti tanaman.
Bonsai bukan hanya sekadar tanaman hias, tetapi juga memiliki filosofi yang mendalam di baliknya.Filosofi di balik bonsai adalah tentang keindahan, kesederhanaan, dan keseimbangan. Bonsai mengajarkan kita untuk menghargai keindahan alam dan menghadirkan elemen alam ke dalam lingkungan kita.
Dalam budaya Jepang, bonsai juga melambangkan kehidupan yang harmonis dan seimbang.Melalui proses pemangkasan dan pembentukan, bonsai mencerminkan kesabaran, ketekunan, dan dedikasi. Proses ini membutuhkan waktu yang lama dan perawatan yang teliti untuk mencapai bentuk dan ukuran yang diinginkan.
Bonsai juga mengajarkan kita tentang kesederhanaan dan keindahan dalam hal-hal kecil.Dalam budaya Jepang, bonsai juga sering dikaitkan dengan meditasi dan refleksi. Melihat bonsai yang indah dan terawat dengan baik dapat memberikan ketenangan dan kedamaian bagi jiwa.
Bonsai juga mengajarkan kita untuk hidup dalam momen sekarang dan menghargai keindahan yang ada di sekitar kita.Dalam kesimpulan, bonsai adalah seni menanam dan membentuk pohon atau tanaman kecil dalam pot.
Filosofi di balik bonsai melibatkan keindahan, kesederhanaan, dan keseimbangan. Bonsai mengajarkan kita untuk menghargai keindahan alam, kesabaran, ketekunan, dan kehidupan yang harmonis. Melihat bonsai yang indah juga dapat memberikan ketenangan dan kedamaian bagi jiwa.
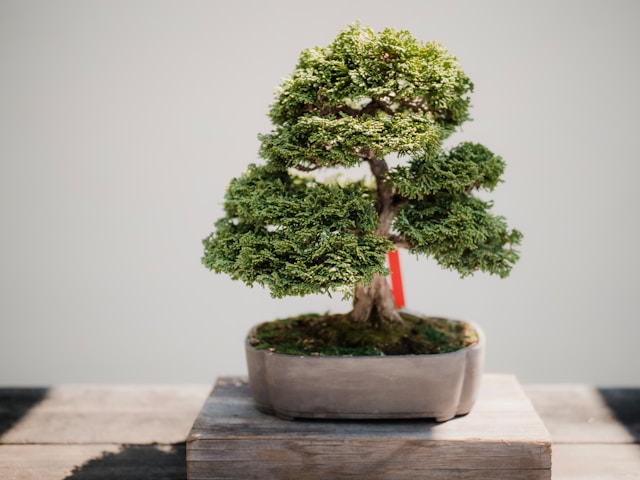
Mengenal Jenis-jenis Bonsai yang Berumur Ratusan Tahun
Jenis bonsai yang menarik perhatian banyak orang adalah yang berumur ratusan tahun. Ada beberapa jenis bonsai yang memiliki usia yang lama dan mengagumkan.
Salah satunya adalah Juniperus procumbens, sebuah jenis bonsai yang berasal dari Jepang. Pohon ini memiliki batang yang tebal dan cabang yang menggantung, memberikan kesan kuat dan megah. Selain itu, ada juga bonsai Pinus pentaphylla, yang juga dikenal sebagai bonsai lima jarum.
Jenis bonsai ini memiliki batang yang indah dan daun yang kecil, menciptakan tampilan yang anggun dan elegan. Bonsai ini dapat hidup hingga 500 tahun atau lebih.Jenis bonsai lainnya adalah Ficus retusa, yang juga dikenal sebagai pohon serut atau fig.
Bonsai ini memiliki daun yang kecil dan akar yang kuat, memberikan kesan yang kokoh dan stabil. Pohon ini dapat hidup hingga 200 tahun atau lebih. Tidak hanya itu, ada juga Pemphis acidula, bonsai yang berasal dari daerah tropis seperti Indonesia.
Tips Memilih Bonsai Berumur Tinggi untuk Koleksi
Memilih bonsai yang berumur tinggi untuk koleksi bisa menjadi tantangan yang menarik bagi para pecinta tanaman hias. Bonsai adalah seni yang melibatkan pemangkasan dan penataan pohon kecil agar terlihat seperti pohon yang sudah tua.
Namun, tidak semua bonsai memiliki usia yang sama. Untuk memilih bonsai berumur tinggi yang cocok untuk koleksi Kamu, ada beberapa tips yang dapat Kamu pertimbangkan.Pertama, perhatikan ukuran bonsai.
Pilih bonsai dengan batang yang kokoh dan cabang yang teratur.Kedua, perhatikan bentuk bonsai.
Bonsai berumur tinggi biasanya memiliki bentuk yang sudah matang dan terlihat alami. Pilih bonsai dengan potongan cabang yang harmonis dan proporsional.Ketiga, perhatikan kondisi tanaman. Pastikan bonsai yang Kamu pilih memiliki daun yang sehat dan tanaman yang kuat.
Periksa juga akar bonsai, pastikan tidak ada kerusakan atau penyakit yang dapat mempengaruhi pertumbuhan tanaman.Dengan memperhatikan tips-tips ini, Kamu dapat memilih bonsai berumur tinggi yang indah dan bernilai tinggi untuk koleksi Kamu.
Proses Perawatan Bonsai yang Berumur Ratusan Tahun
Proses perawatan bonsai yang berumur ratusan tahun membutuhkan kesabaran dan keahlian yang tinggi. Bonsai adalah seni memanipulasi pohon agar tumbuh dalam ukuran miniatur yang indah. Untuk menjaga keindahan dan kesehatan bonsai yang telah berusia ratusan tahun, perawatan yang tepat sangatlah penting.
Proses perawatan meliputi pemangkasan akar, pemangkasan ranting, serta pemupukan yang teratur. Selain itu, bonsai yang sudah tua juga membutuhkan perawatan khusus seperti tanah yang cocok, penyiraman yang tepat, dan perlindungan dari cuaca ekstrem.
Dengan perawatan yang baik, bonsai yang telah berusia ratusan tahun dapat tetap indah dan menginspirasi generasi selanjutnya dalam seni bonsai.
Teknik Pemangkasan pada Bonsai Berumur Tinggi
Terkadang, pemangkasan pada bonsai berumur tinggi bisa menjadi tantangan tersendiri. Namun, dengan memahami teknik yang tepat, Kamu dapat mempertahankan keindahan dan karakteristik unik dari bonsai tersebut.
Penting untuk memahami bahwa setiap pemangkasan harus dilakukan dengan hati-hati dan dengan tujuan yang jelas. Bonsai berumur tinggi memiliki sejarah pertumbuhan yang panjang, sehingga pemangkasan harus dilakukan secara bertahap dan selektif untuk memastikan keselamatan dan kesehatan pohon.
Melalui pemangkasan yang bijaksana, Kamu dapat menciptakan bonsai yang tetap harmonis dengan alam dan tetap memancarkan keindahan yang telah terakumulasi selama bertahun-tahun.
Penyiraman yang Tepat untuk Bonsai Berumur Ratusan Tahun
Penyiraman yang tepat sangat penting untuk menjaga kehidupan bonsai berumur ratusan tahun. Bonsai adalah pohon kecil yang dikultivasi dan dibentuk sedemikian rupa agar terlihat indah dan harmonis. Dalam merawat bonsai, penyiraman menjadi salah satu aspek terpenting yang harus diperhatikan.
Bonsai yang berumur ratusan tahun memiliki akar yang sangat sensitif dan rentan terhadap kelebihan atau kekurangan air. Oleh karena itu, penting untuk menyiram bonsai dengan tepat dan bijaksana.
Bonsai yang berumur ratusan tahun biasanya membutuhkan penyiraman yang lebih sering pada musim panas dan lebih sedikit pada musim dingin. Dengan memahami kebutuhan air yang tepat, bonsai berumur ratusan tahun dapat tumbuh dengan baik dan tetap indah sepanjang waktu.
Pemupukan yang Diperlukan untuk Bonsai
Pemupukan sangat penting dalam perawatan bonsai agar tanaman tetap sehat dan cantik. Bonsai adalah miniatur pohon yang membutuhkan perawatan khusus. Salah satu aspek terpenting adalah pemupukan yang tepat.
Nutrisi ini dapat membantu pertumbuhan daun, bunga, dan akar yang sehat. Selain itu, pemupukan juga membantu meningkatkan kekuatan tanaman dalam melawan penyakit dan hama.
Pemupukan yang tepat akan membuat bonsai Kamu tetap indah dan tumbuh dengan baik.
Keunikan Media Tanam untuk Bonsai Berumur Ratusan Tahun
Bonsai merupakan seni unik yang melibatkan pemangkasan dan pengaturan pohon kecil agar terlihat seperti pohon besar yang telah berusia ratusan tahun. Salah satu faktor penting dalam merawat bonsai adalah media tanam yang digunakan.
Ada beberapa keunikan dalam media tanam untuk bonsai berumur ratusan tahun.
- Bonsai menggunakan campuran tanah liat, serbuk gergaji, dan pasir untuk menciptakan media tanam yang ideal.
Media tanam ini memiliki kemampuan menyimpan air dengan baik dan memberikan nutrisi yang dibutuhkan oleh pohon bonsai.Selain itu, keunikan lain dari media tanam untuk bonsai berumur ratusan tahun adalah penggunaan batu-batuan kecil atau kerikil sebagai lapisan dasar.
Lapisan ini membantu menjaga drainase yang baik dan mencegah akar bonsai dari kelembaban berlebih.Dalam merawat bonsai berumur ratusan tahun, pemilihan media tanam yang tepat sangat penting. Dengan menggunakan media tanam yang unik dan sesuai, bonsai dapat tumbuh dengan baik dan tetap indah seiring berjalannya waktu.
Mengatasi Penyakit dan Hama pada Bonsai Berumur Tinggi
Bonsai berumur tinggi memiliki keunikan dan keindahan tersendiri, namun juga rentan terhadap serangan penyakit dan hama.
Bersihkan dedaunan yang layu atau mati, serta cabut gulma yang tumbuh di sekitar bonsai.
Hal ini dapat mencegah pertumbuhan jamur dan penyebaran hama.Kedua, berikan nutrisi yang tepat pada bonsai. Pastikan bonsai mendapatkan pupuk yang sesuai dengan kebutuhan dan umurnya. Nutrisi yang cukup akan membantu meningkatkan sistem kekebalan bonsai terhadap penyakit.
Tempatkan bonsai pada lokasi yang mendapatkan sinar matahari yang cukup, tanah yang cukup lembab, dan sirkulasi udara yang baik. Hal ini akan membantu menjaga kondisi bonsai tetap sehat.
Konsultasikan dengan ahli bonsai atau petani tanaman jika diperlukan.Dengan melakukan langkah-langkah tersebut, kita dapat mengatasi penyakit dan hama pada bonsai berumur tinggi dengan efektif.
Terima kasih telah membaca artikel ini tentang Rahasia Bonsai Berumur Ratusan Tahun yang Diburu Kolektor. Bonsai bukan hanya sebuah tanaman, tetapi juga sebuah karya seni yang memerlukan perawatan dan dedikasi yang tinggi.
Semoga artikel ini memberikan wawasan baru bagi para pembaca tentang keindahan dan keunikan bonsai.